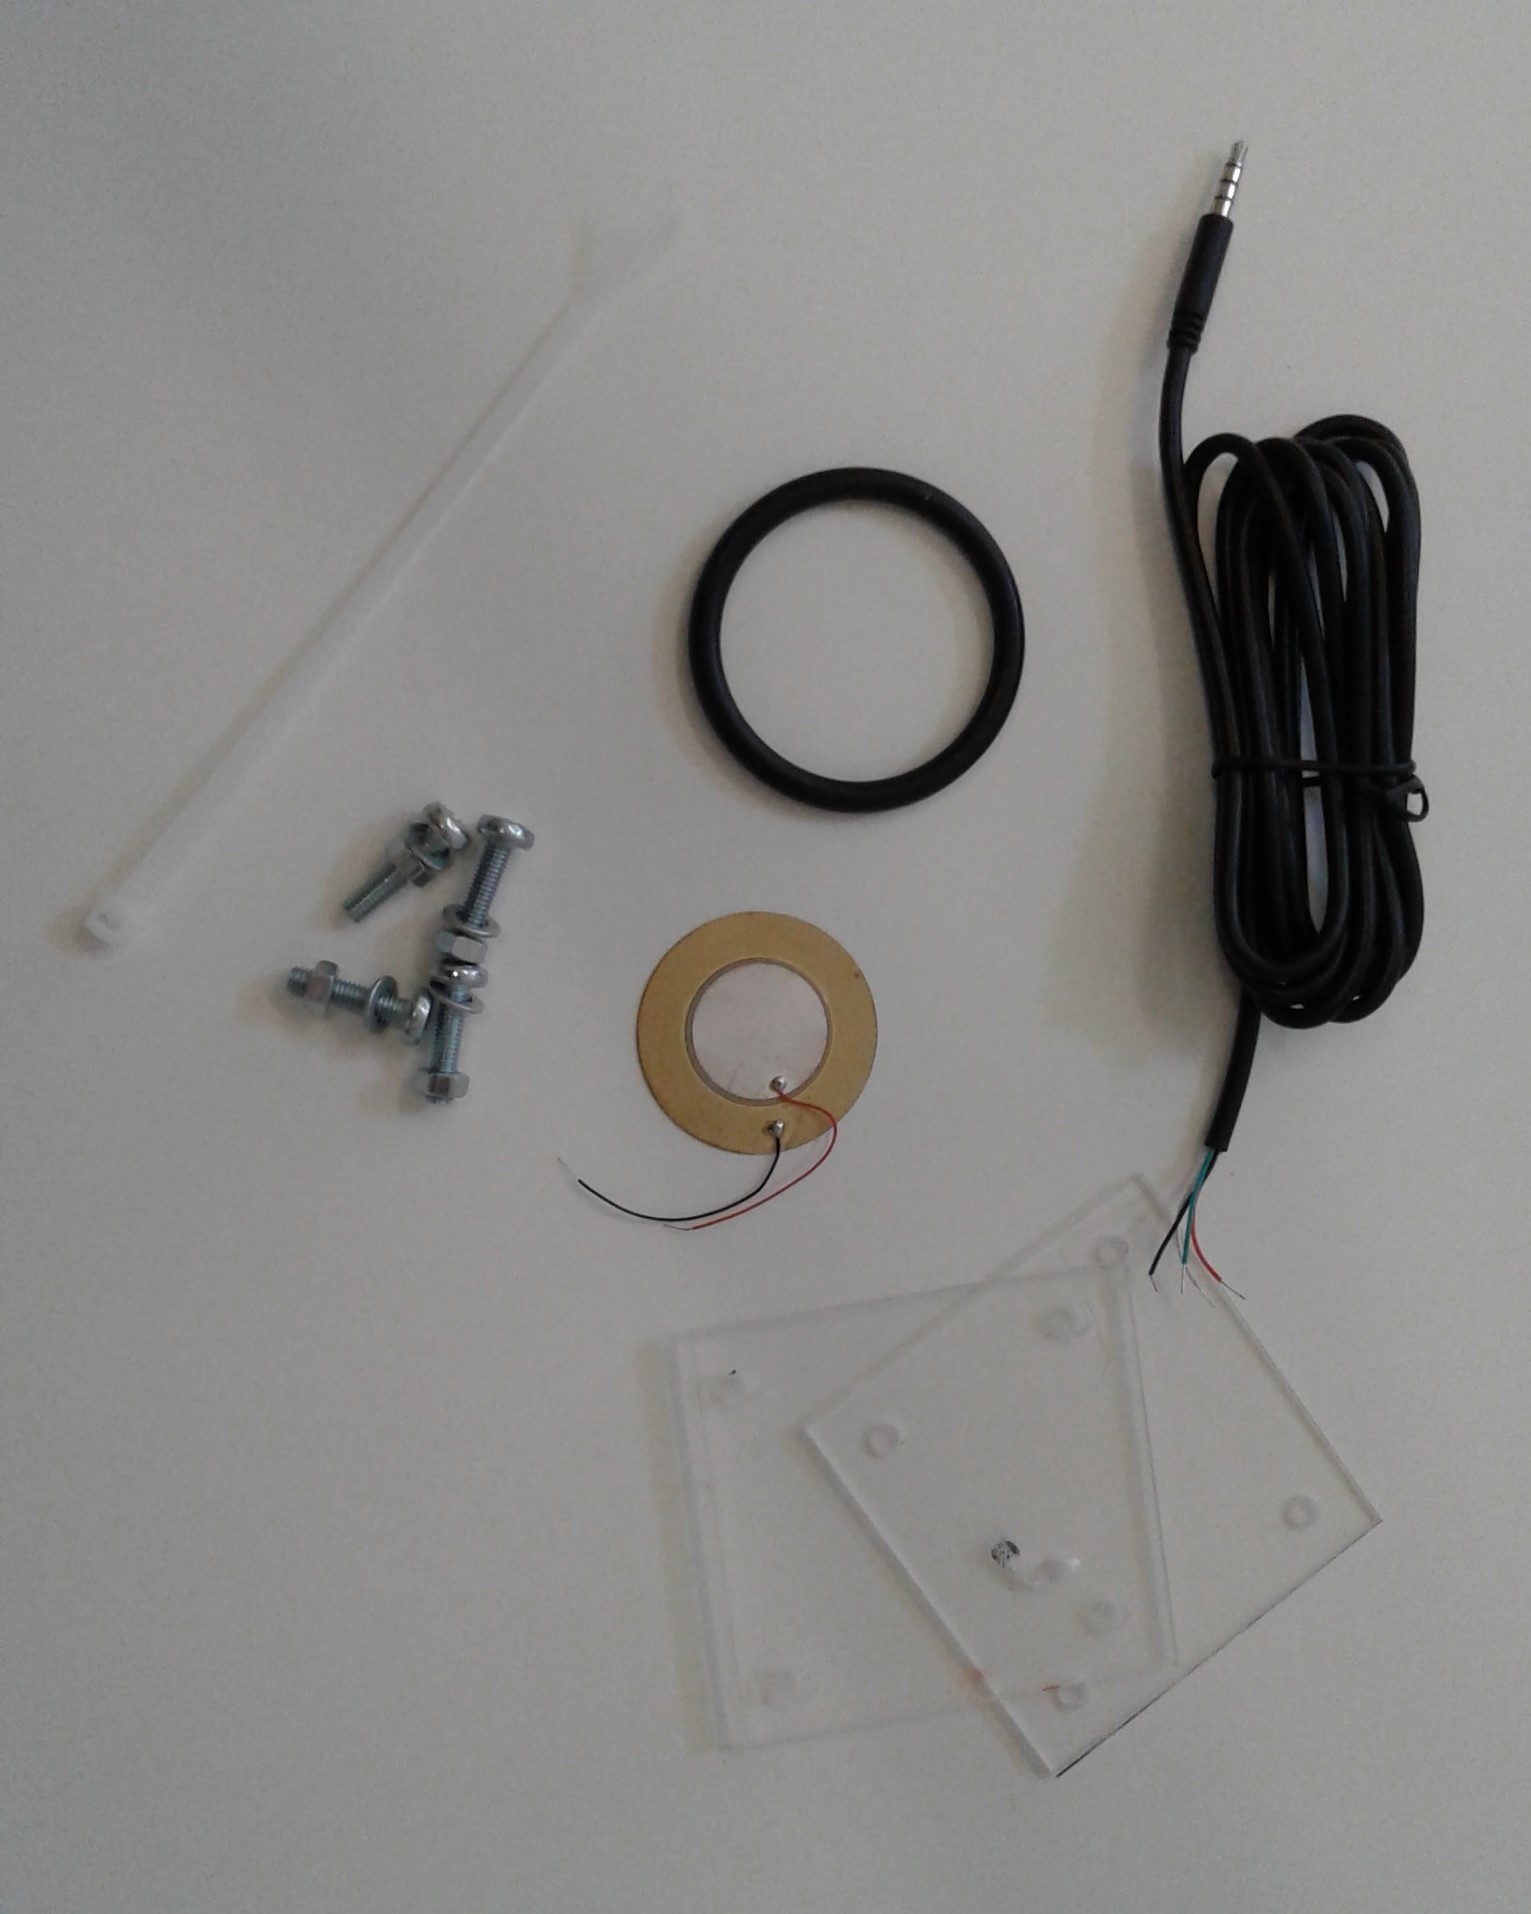
In your hydrophone kit you will find:
2 x 75mm square acrylic plates
1 x O-ring
1 x Piezo disc
1 x TRRS audio cable
4 x nuts, bolts and washers (6mm)
1 x cable tie
Equipment needed:
Safety glasses
Sandpaper (light)
Superfix glue
Heat shrink tubing
Wire cutters
Soldering iron and solder
Heat gun
Screwdriver
Waterproof epoxy
Instructions:
Note: There are two square acrylic plates. The top plate has an angular hole drilled into it for inserting the TRRS cable through later in these instructions and both acrylic plates have four corner holes drilled for connecting both together with the nuts, bolts and washers.
- Lightly sand a circular area about the size of the piezo disc on the surface of the bottom acrylic plate (the one without the central hole). This will help with glue adhesion.
- Add a few small drops of superfix glue to the sanded area.
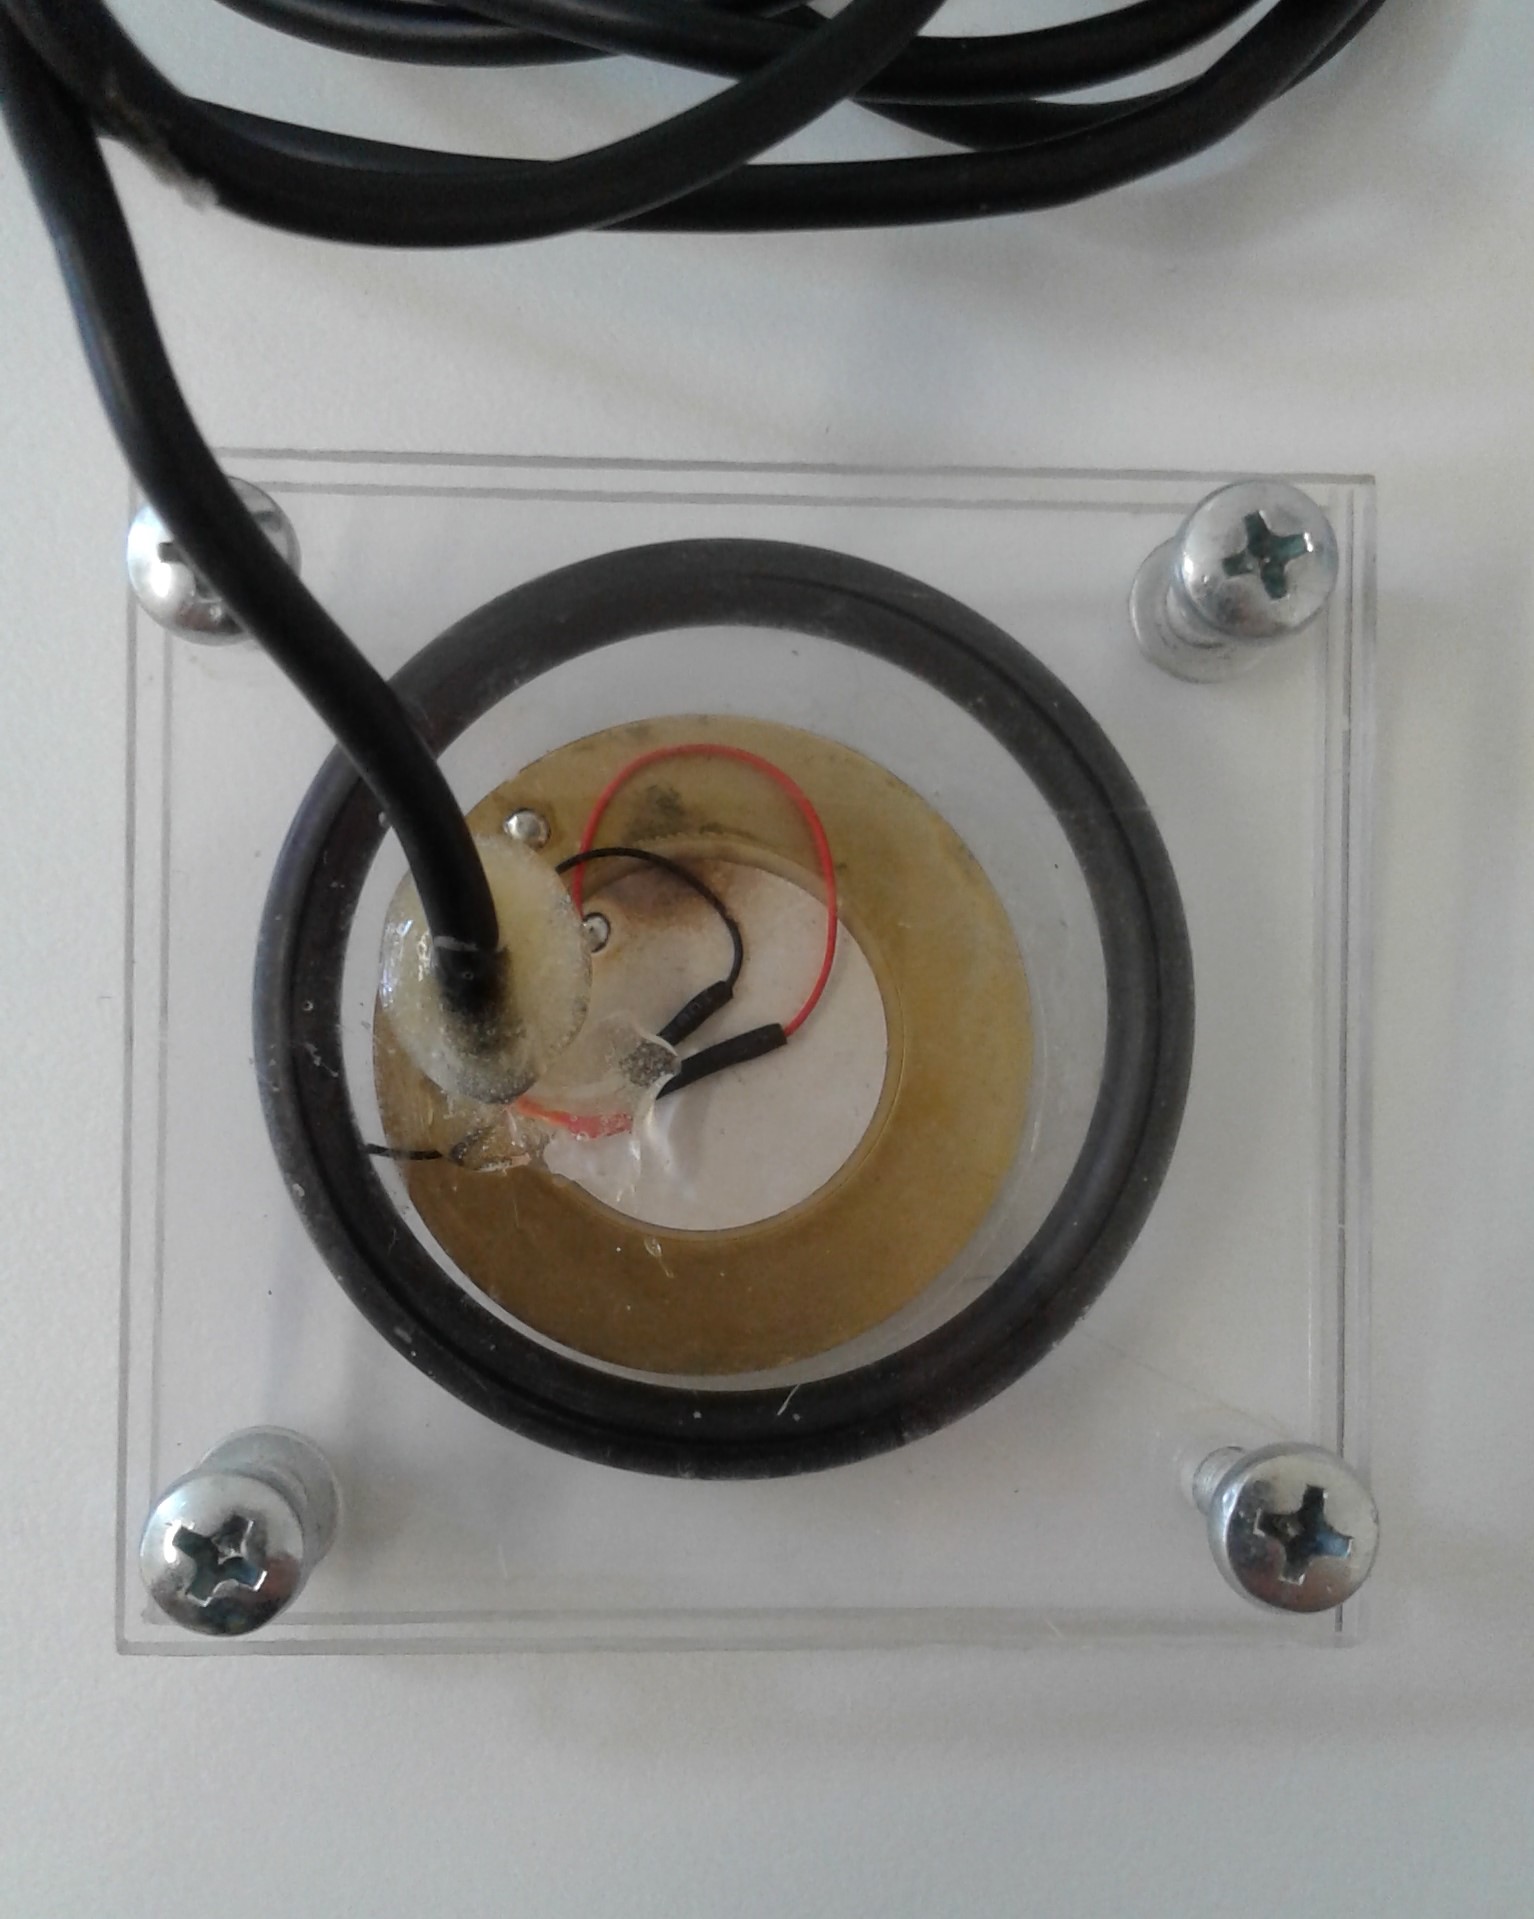
- Place the piezo disc in the centre overtop of the glue and press down lightly to secure and set.
- Position the O-ring so that is surrounds the piezo disc.
- Insert your TRRS audio cable through the top angular hole of the top acrylic plate.
- Slide the heat shrink tubing over the red and black wires of the piezo disc.
- Solder the black wire of the piezo disc to the black wire from the TRRS audio cable and the red wire of the piezo disc to the green wire of the TRRS audio cable. Trim the red and white wires using the wire cutters.
- Use the Heat Gun to shrink the tubing around the solder joins.
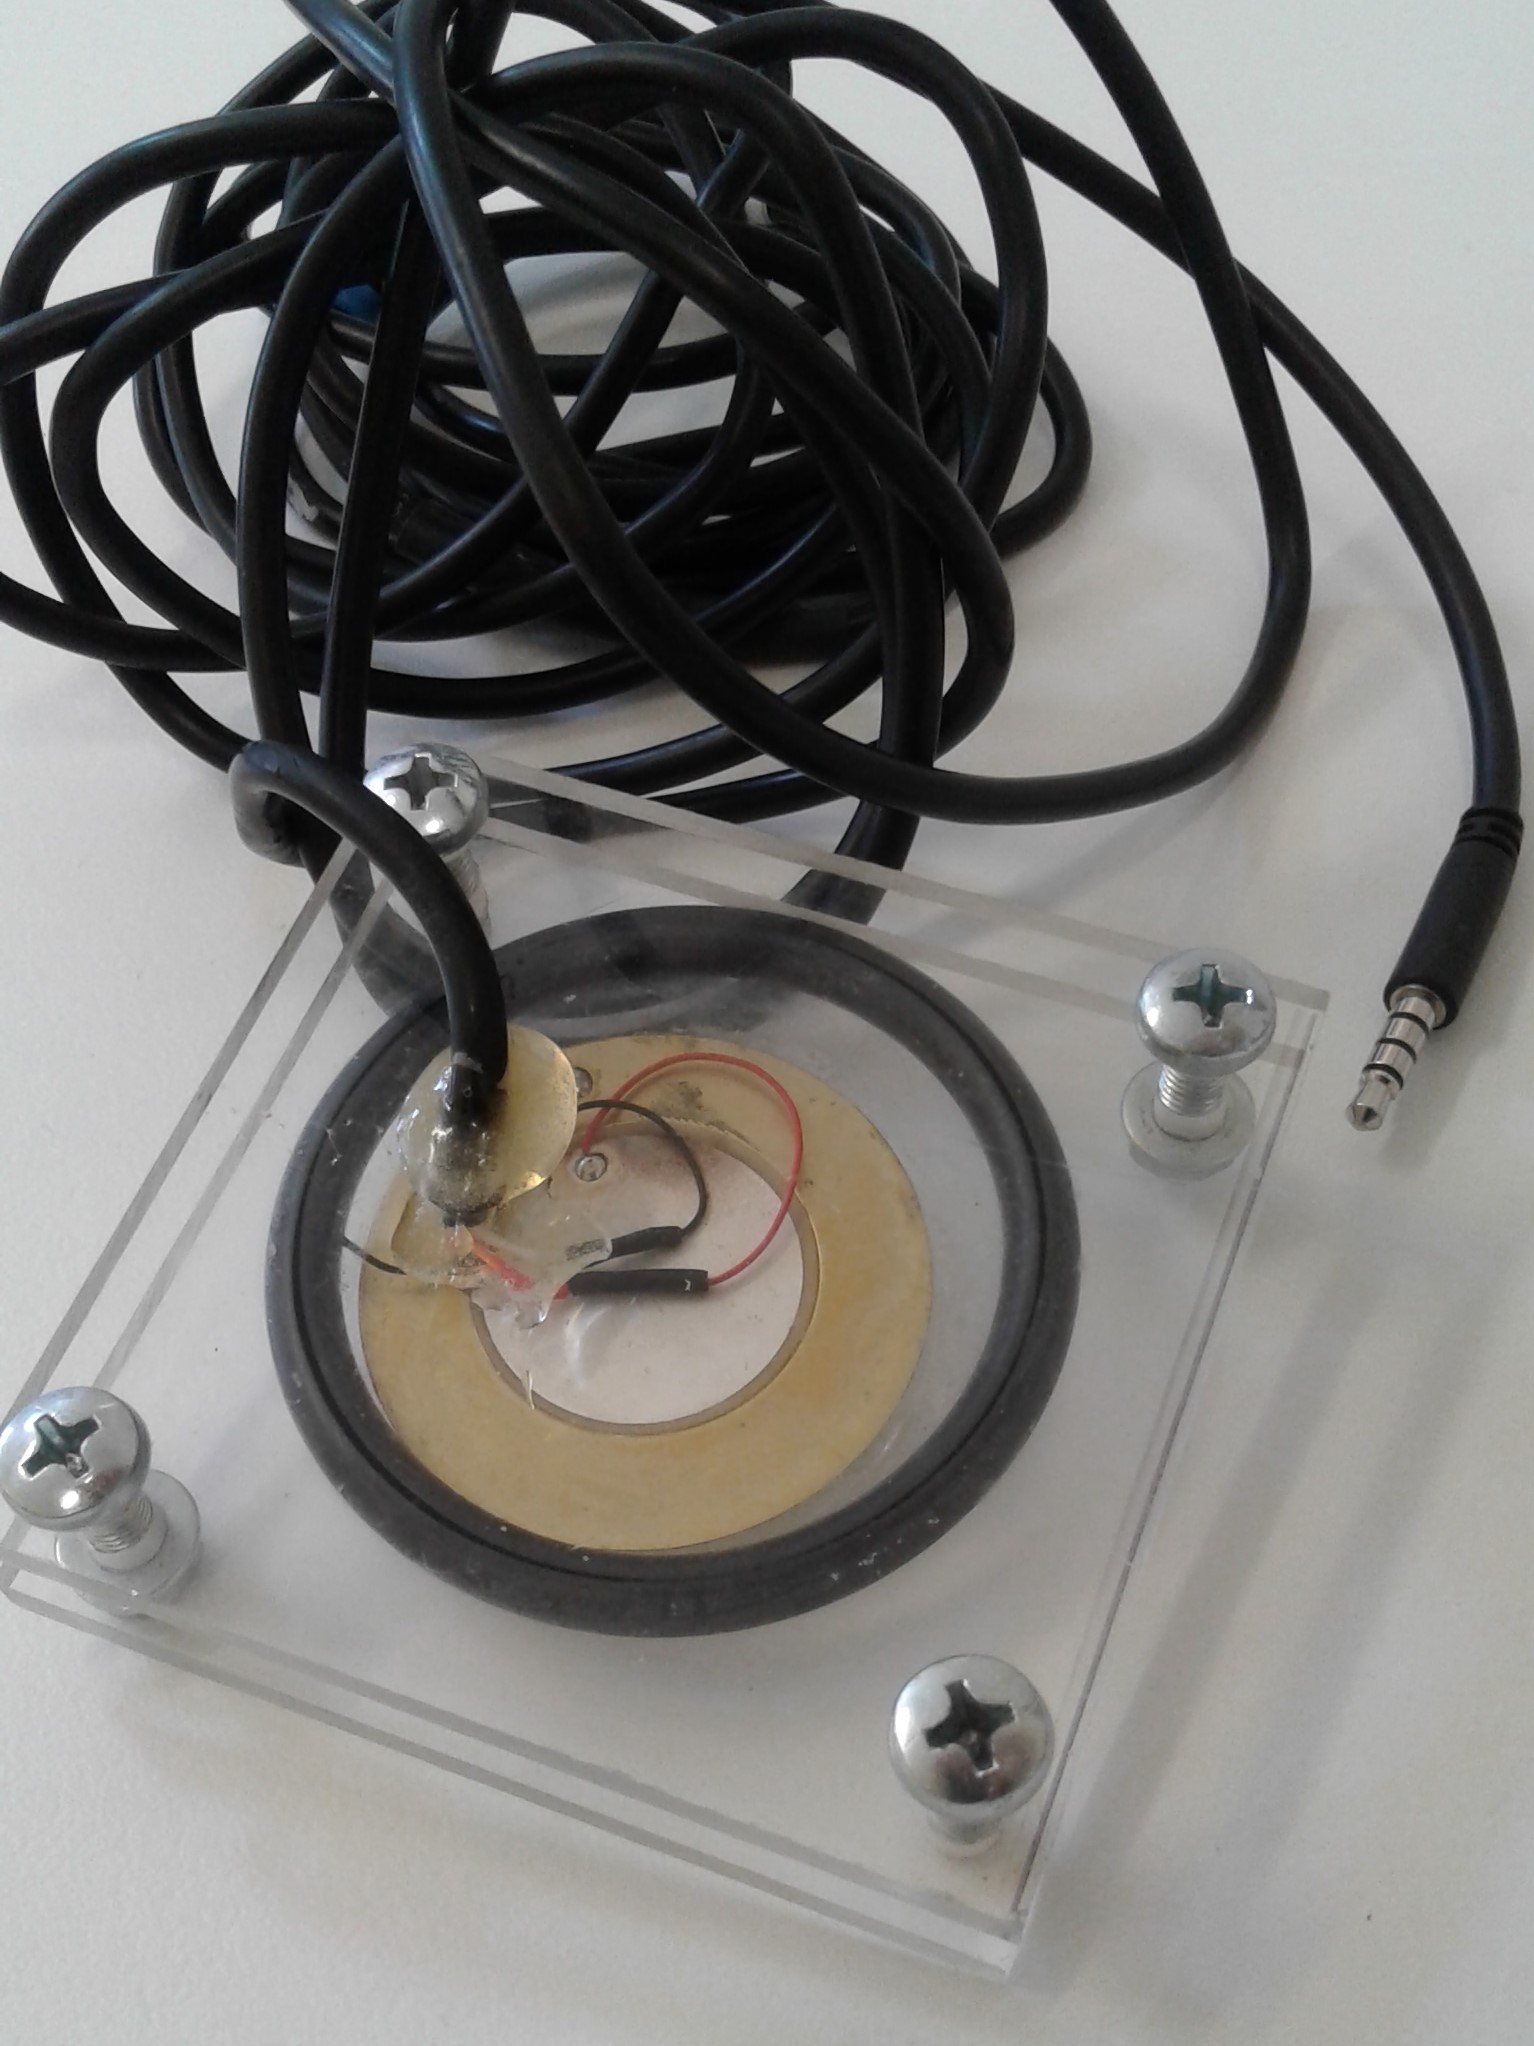
- Screw the plates together and carefully tighten with a screwdriver from opposing sides. Make sure that all wires are inside the O-ring. Tighten enough so that the seal is pressing evenly against the top and bottom acrylic plates, but not too tight that you are bending the acrylic.
- Use waterproof epoxy to fully seal around the hole where the TRRS cable is inserted through the top acrylic plate.
- Secure the TRRS cable with the cable tie around one of the nuts. This will prevent movement of the TRRS cable at the sealed area.